channel
SELF ECO
Edge Rail: -
Length: 50 / 100 cm
Nominal width: 100 mm


| SELF ECO channel product specifications | |
|---|---|
| Material | polymer concrete |
| Length | 50 / 100 cm |
| Width | 12 cm |
| Height | 8 cm |
| Weight | 3.2 - 6.3 kg |
| Nominal width | 100 |
| Joint formation | UNILINK®- Joint |
| Clasp | Snap-in fastening |
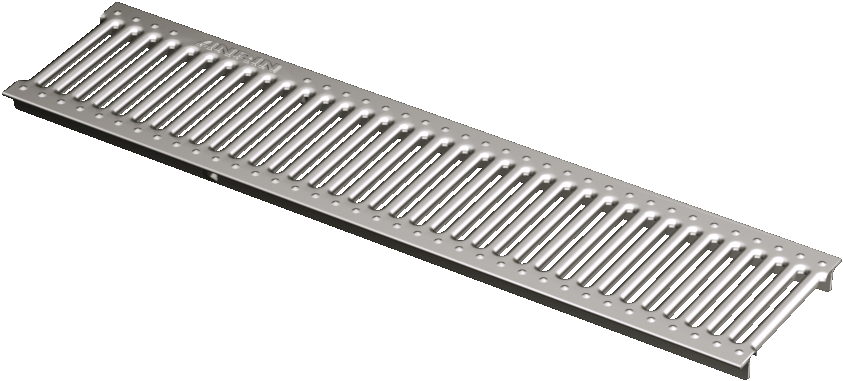
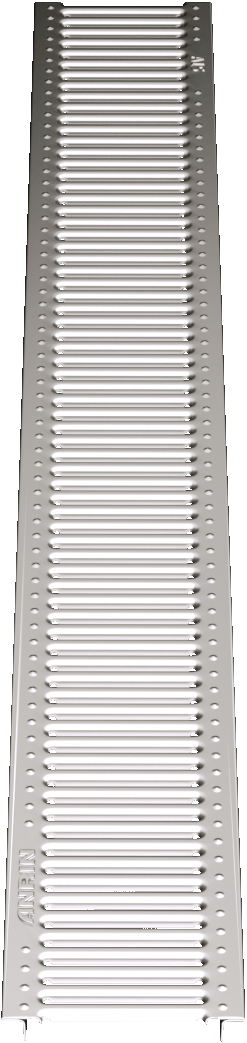
| Load capacity | Galvanised slotted grating HEELGUARD cl. A15, cast-slotted grating HEELGUARD cl. B125 |
Channel dimensions for SELF ECO

ANRIN UNILINK®-Joint


The optimised UNILINK® joint system eliminates the traditional differentiation between the beginning and end of the channel. Elements of an equal installation height can be joined in any arbitrary direction. The symmetrically divided half-joints enable the optional sealing of the splicing. Vertically aligned grooves and tongues support an efficient installation: In the process, the installation alignment can be chosen arbitrarily!
The flexibility in the design and installation phases enters a new dimension with the UNILINK® joint!
ANRIN Snap-in fastening

Decades of experience and detailed product development in the areas of assembly, maintenance and cleaning of drainage systems have produced impressive solutions for permanent fastening technologies.
ANRIN Snap-in fastenings are optimised for the specific load classes and unite reliability and high quality with functional design.
Accesseorie for SELF ECO

Channel body
SELF ECO

End cap
with DA / OD 110 NBR seal rings
SELF ECO

End cap PP made of Polypropylene
grey
SELF ECO

End cap PP made of Polypropylene
black
SELF ECO

Sump unit
SELF ECO
Accessories dimensions for SELF ECO sump unit

SELF installation instructions
With ANRIN drainage systems, accumulating rainwater should be drained safely and quickly. Moreover, the structural elements have the task of accommodating dynamic loads arising from traffic-related demands and dispersing them to the area of the foundation.
Amongst others, the following technical rules and regulations in their respective valid versions must be observed for the selection, design and installation of ANRIN drainage systems.
The following installation guidelines are schematic representations. These are provided as examples and are non-binding. The information provided here is based on our long-term experience in excavation and road construction as well as the state-of-the-art technology. Despite this, designers and planners are always obligated to check the products and the installation instructions for their appropriateness. The example details are simplified recommendations for execution.
Constructions are to be re-created on a project-specific basis.

1.
Excavate trench. Fill in and pre-compact base course. Apply concrete pad, 3 parts sand + 1 part cement + 1 part water, to base course.

2.
Connect pipe connections to the pipeline.

3.
Place channel elements and sump unit on the concrete pad. Align components so that they are level.

4.
Position end caps.

5.
Complete the series and ensure the level alignment of the components.

6.
Backfill the concrete pad.

7.
Lay the paving.

8.
The surface should be 2 to 5 mm higher than the cover grating.
Instructions and Regulations
Guidelines and regulations
The current guidelines and regulations of the state-of-the-art technology must be observed for the installation.
For example, these are:
DIN EN 1433 „Drainage channels for vehicular and pedestrian areas“
DIN 19580 „Drainage channels for vehicular and pedestrian areas“
RStO „Guidelines for the standardisation of the superstructure of vehicular areas“
DIN EN 206-1 „Concrete. Specification, performance, production and conformity“
DIN EN 1045-2 „Concrete, reinforced and prestressed concrete structures. Part 2: Concrete – Specification, properties,
production and conformity; Application rules for DIN EN 206-1“